

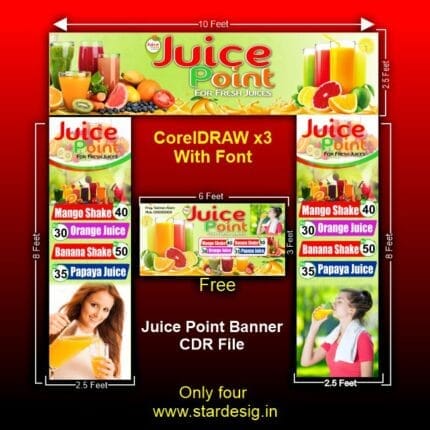
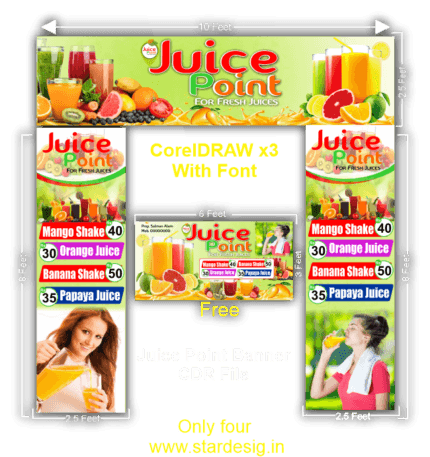
Priting Press Banner CDR File
Understanding CDR File Format
The CDR file format, developed by Corel Corporation, is a proprietary vector graphic file format primarily associated with CorelDRAW, a popular graphic design software. CDR files are known for their capability to store complex vector graphics, which are mathematical representations of images that allow for infinite scaling without loss of quality. This attribute makes them particularly suitable for producing high-quality printing press banners and other promotional materials.
One of the key characteristics of CDR files is their ability to encompass a diverse range of design elements, including text, shapes, and colors, all in a single, editable format. Unlike raster graphics, which are pixel-based and can lose quality when scaled, CDR files maintain crispness and clarity at various sizes. This quality is essential in the printing industry, where precision is paramount in delivering stunning and professional results.
The advantages of using CDR files extend beyond just scalability. For instance, CorelDRAW offers extensive tools for design manipulation, allowing users to create intricate graphics that can be tailored to suit specific branding needs. These files also support multiple layers and can incorporate various effects such as gradients and transparencies, providing designers with the flexibility to create visually engaging banners that stand out.
In the printing industry, CDR files are commonly utilized for a range of applications from producing business signage and promotional banners to designing retail displays. Their compatibility with various printing technologies ensures that the final outputs are both vibrant and accurate. Overall, understanding the CDR file format and its unique features is crucial for anyone looking to create eye-catching printing press banners that effectively convey their message while adhering to high-quality standards.
Designing Your Banner: Best Practices
Creating an effective print banner involves a careful consideration of several design elements that can significantly enhance its visibility and impact. First and foremost, choosing the right dimensions is critical. Depending on where the banner will be displayed, such as indoors or outdoors, the size should be appropriate to ensure that it captures attention from a distance. Larger banners can create a dramatic effect, while smaller banners may be suitable for more intimate settings.
Next, color schemes play a vital role in banner design. The colors selected should not only align with the branding but also evoke the desired emotions and reactions from the audience. High-contrast color combinations can improve legibility from afar. It is advisable to limit the palette to three to four primary colors to maintain a cohesive look and avoid overwhelming viewers.
Typography is another crucial element. The font style should be clear and easy to read. It is recommended to use bold, sans-serif fonts for headlines and larger text, while maintaining readability. Additionally, the hierarchy of text should be established through varying font sizes; this way, the most important information stands out effectively. Ensure that the text is concise, conveying the key message quickly and directly.
The use of imagery can greatly enhance the appeal of a banner. High-quality images relevant to the message can create an emotional connection with the audience. Ensure that images are not overly complex, as they should complement the text rather than distract from it. Moreover, knowing the target audience and the environment in which the banner will be displayed allows for more tailored design choices, maximizing engagement. By adhering to these best practices, one can create an eye-catching and effective printing press banner that successfully communicates its intended message.
How to Create a CDR File for Your Banner
Creating a high-quality CDR file for your banner using CorelDRAW can significantly enhance its visual appeal and print quality. Begin by launching CorelDRAW and setting up a new document. Select the appropriate size for your banner by going to File > New, and then specify the dimensions appropriate for your needs. It’s recommended to work in a CMYK color mode for accurate color reproduction in print. You can alter this in the document settings.
Next, familiarize yourself with the layers feature. Organizing your design into layers allows for easier editing and manipulation. You can create layers for the background, text, and any graphic elements, which helps in managing the design more efficiently. To add layers, navigate to the Object Manager docker and use the ‘New Layer’ option.
When designing your banner, utilize the Shapes tool to create various geometric forms that can serve as backgrounds or accompanying graphics. Incorporate text using the Text tool, ensuring to select fonts that are legible from a distance, considering that banners are often viewed from afar. Adjust font sizes and styles accordingly, and use contrasting colors to make your text stand out against the background.
As your design progresses, remember to frequently save your work. Use the CMD/CTRL + S shortcut to avoid losing any changes. When you are satisfied with the layout and composition, it’s time to export your design. Go to File > Export and select CDR as your format, making sure to optimize the settings for printing quality. Choose a high-resolution DPI (300 or higher) to ensure crisp and clear prints, and check the color profile settings, sticking to CMYK to maintain color integrity.
By following these steps, you will effectively create a CDR file tailored for a professional banner. This file will not only be conducive to high-quality printing but also yield visually striking results. Practical industry-oriented tips and techniques will ensure that your banner stands out, capturing the attention it deserves.
Preparing Your CDR File for Printing
When it comes to creating eye-catching printing press banners, the preparation of your CDR (CorelDRAW) file is a critical step that can significantly impact the final output. One of the foremost considerations is the resolution of your artwork. For print purposes, it is advisable to set your resolution to a minimum of 300 DPI (dots per inch) to ensure that the banner appears sharp and professional when printed. Lower resolutions can lead to pixelation, which diminishes the quality of your final product.
Another important factor to consider is the color mode of your design. While RGB (Red, Green, Blue) is suitable for digital displays, printed materials require CMYK (Cyan, Magenta, Yellow, Key/Black) color mode. Converting your artwork to CMYK before sending it to the printing press helps prevent any unexpected color discrepancies that may arise during the printing process.
In addition to resolution and color mode, ensuring that you have the correct bleed and margins is essential for a polished final product. Bleed refers to the area of the design that extends beyond the trim line, allowing for trimming errors and ensuring that no unprinted edges appear in the final banner. A standard bleed of 0.125 inches is often recommended. Properly setting margins can also prevent important text or graphics from being cut off during the trimming process.
Once you have confirmed these elements, export your CDR file in a print-ready format, typically as a PDF, to ensure compatibility with the printing press. It is important to check the settings during export to maintain quality and color fidelity. Common pitfalls include neglecting to proofread your design or failing to adjust the dimensions according to the printer’s specifications, so be diligent in reviewing your work. Following these steps will enhance your chances of achieving a stunning and effective banner.
Choosing the Right Printing Press and Materials
When embarking on the journey of creating eye-catching printing press banners using CDR files, one of the foremost considerations is selecting the appropriate printing press and materials. The choice of printing press significantly affects the final product’s quality, durability, and overall appearance. Several factors must be taken into account, including budget, quality, turnaround time, and the specific materials that are best suited for the intended design.
Budget remains a primary concern for many businesses and individuals. Typically, digital printing is more cost-effective for shorter runs and allows for quick production, making it ideal for banners that are often used for promotions or events. On the other hand, offset printing proves to be more economical when producing larger quantities due to its lower cost per unit, which can be advantageous for bulk orders. Each option presents different advantages and constraints, so it is essential to evaluate them based on your needs and financial constraints.
Quality is paramount; hence, the choice of printing technique can greatly influence the visual impact of the banners. Digital printing offers superb color vibrancy and detail, while offset printing generally provides a consistent, high-quality finish across large volumes. Consider how the printing method you choose impacts the aesthetics of the CDR files being utilized.
Furthermore, the choice of materials is crucial for ensuring durability and effectiveness. Common materials include vinyl, fabric, and paper. Vinyl is renowned for its robustness, making it ideal for outdoor displays, while fabric offers a sophisticated look suitable for indoor settings. Additionally, ensuring that the materials selected match the intended use and environmental conditions can greatly enhance the life span of the banners.


Reviews
There are no reviews yet.